Mid-week in pictures

Another week is flying by. The weather is warm during the day but cool at night. The leaves are changing. It’s my mother’s birthday (Happy birthday, Mum!).

Our green onions are happy. The tomatoes are slowing down. Our raspberries are fruiting like mad, but whenever I take Elena out to pick them we always head back inside with an empty container. I wonder why? There’s a self-sown vine flowering in the backyard. It’s too late in the season, but I think it might be a zucchini. I’ll be interested to see how it grows and if it manages to fruit. I have to start thinking about winter vegetable crops and whether I can be bothered this year with work and all. I need to get onto my weed eradication again, just as soon as my toe stops hurting.

I have a gorgeous super-secret pattern testing project on the boards, and a winter coat pattern for Elena that’s crying out for some fabric. I wonder if I’ll be brave enough to venture out to the fabric store with both the little ones tomorrow? I’ve purchased some new clear bags for my Etsy sales, which are happening slowly.

The children are happy, but our snot levels are higher than I’d like. Oh well. That’s how it goes…and that’s about it for our week so far.

leaves are changinggreen onions eating raspberriesrandom vinesweet peas planted snack time is a serious business chickens dustbathing

Posted in mid-week in pictures | 2 Comments

Blogs and the beanie I just don’t like

Blogs are a funny thing. You write whatever occurs to you, and other people read it if it takes their fancy. It seems impermanent and fleeting – but it’s really not. I’m conscious that what I write will be online forever thanks to caches and the like. I won’t be able to take my content down down or alter my online history. When the children are older, they’ll be able to see exactly what I’ve written. Work colleagues, loose acquaintances and family stumble across the blog thanks to the vagaries of social networks. With all this in mind, I’m unlikely to write about the fact my bathroom often needs a scrub, my crisper could do with a spring clean or our latest discipline challenge with the children.

I read something very succinct a while back on one of my favourite knitting blogs, knit the hell out, about how blogs are people’s exterior representation of themselves and that there’s not much to be gained by comparing one’s own interior to that representation (I can’t find the post now – Cassy feel free to link up in the comments if you’re reading!). It really struck a chord with me – mainly because it’s easy to become insecure about others’ beautiful blogged lives and fantastic projects with seemingly endless designer materials, but also because I get lots of comments about how I manage everything.

My life is chaotic, the house is generally a mess, I’ve recently returned to the workplace part-time and we have two strong-willed children under three. Do I need to say any more? All of this is a long-winded and round-about way of saying that things aren’t always perfect at our place – but you won’t read about it here.

Except for today…and this blasted beanie I’ve been knitting. I’m more than happy to share my craft fails.

i heart cables beanieI wrote about this hat a while ago. I bought the yarn to make a birthday present for a lovely little boy but jut couldn’t get it to work. Needless to say he got a different gift. Pulled apart and knitted up a number of times, I eventually decided the pattern might not be the best use of the yarn, ripped my latest disaster apart and cast on an I heart cables for a little girl who was also expecting a birthday. It was still atrocious. This is the sixth iteration of a hat with this yarn and I’m still unhappy. Really unhappy.

Somehow it looks decent enough on, but it has big holes behind the cables despite me trying every trick in the book to tighten them up. I’d be knitting along for a while and then all of a sudden have an *extremely* loose stitch. I’d even out the yarn so the super loose stitch no longer existed, but then have another one on the next or subsequent row. It could just have been me, or it could have been the yarn. I’ll probably never work it out. It’s not driving me nuts at all.

I considered pulling the whole thing apart and starting on something else, but I suspect that wouldn’t be a happy experience either. I pressed on and got it done.

flatElena is pleased to have received a new beanie, and hasn’t noticed one of the cables has gone askew. She adores the pom pom (made using this tutorial). I’m just pleased to have cast it off! I only blocked it gently – I suspect it might respond well to a hard blocking but it is on the big side already and I didn’t want to risk it stretching too much.

I heart cables with pom pomI must say, however, that I didn’t mind this pattern. I think it has a few errors in it (I’m not at all experienced with cables, but I don’t think the designer’s instructions match the abbreviations and would lead to it all being uneven), but other than that it has been workable and looks quite sweet. When I’ve recovered from the trauma of this hat I may well knit another I heart cables – but you can be sure as heck I won’t be using Clekheaton Country Aran.

I think it’s time for a sewing project or three.

Posted in blogging, clothes for children, knitting, yarn | 25 Comments

{gluten & dairy-free} crunchy battered fish

We’ve had an odd day. We were at the farmers markets by 0830, then off to pick up some groceries I’d ordered online and a box of nappies at Costco. After the shops, we went on to the produce place to pick up some chicken feed. We got home, the kids had lunch and then Elena was off to swimming.

Having fallen asleep momentarily in the car, Hugo wasn’t remotely interested in his nap. Elena got home from swimming and had a snack and then they were both into bed for a rest. I went down for a nap too – and none of us woke up until after 1600. Alex got a good few hours of blissful quiet! Alas, my nap meant I didn’t get to the curtain store or the fabric store as I was planning. Oh well – I don’t mind…I got a nap I really needed! *insert happy dance*

Anyway, back to my point. We picked up some beautifully fresh ocean perch at the markets this morning, and I really wanted to make battered fish for dinner because it’s such a treat.

Store-bought battered fish is pretty much a total no-go if you’re coeliac or gluten intolerant. Even if the take-away place has gluten-free batter, their oil would most likely be contaminated too. Pretty much our only option is to make it ourselves.

This batter behaves just like normal batter. Use oil suitable for deep-frying (I used canola oil this evening), lightly coat the fish in the batter, and don’t put too much fish in at a time. I once heard that the best way to deep-fry fish was to lay the fillet into the oil skin-side down – but that could be a total old wives’ tale. Who knows. I do it anyway!

gluten free dairy free crunchy battered fishThe end result is crunchy and is just like ‘real’ takeaway fish.

Of course, Hugo is also dairy-free, so I’ve used almond milk here. If you have no problems with dairy, by all means just use normal milk. Soy or rice milk would also work if you’re avoiding nuts.

{gluten-free & dairy-free} crunchy battered fish

  • Servings: 2 cups
  • Difficulty: easy
  • Print

Ingredients

2/3 cups gluten-free plain flour
1/3 cup gluten-free corn flour
1 tsp gluten-free baking powder
1 tsp salt
1/4 cup almond milk
3/4 cup cold soda water (club soda)

Method

Mix dry ingredients well and slowly beat in the milk and soda water until smooth.

Dip fish (or chicken, onion rings or anything else you’d like to batter) into the batter and allow excess to drip off.

Deep fry until golden and fish is cooked.

Posted in dairy-free, gluten-free, recipe, savoury | 4 Comments

Mid-week in pictures

We’ve had a busy week with my parents in town. We’ve been potting up cuttings and seedlings, getting log-splitting lessons, constructing a feeder for the chickens, weather-proofing the run a little more, watching the chickens and waiting for the seasons to change. Those green leaves will soon be gone.

potting cuttings little miss mischief pots ada log splitting lessons feeder part DIY chicken feeder weather proofing fruit and veg delivery maud tendril three girls unidentified vine won't be green for long evening rush hour

Posted in chickens, garden, mid-week in pictures | 3 Comments

A family long weekend

We had a long weekend this weekend to celebrate Canberra Day. My parents are visiting so everything’s a bit crazy and we’ve been getting up to all sorts of things which are not remotely blog-worthy. Dad and I constructed some shelving and reorganised our garden shed, Mum has been getting through our seemingly never ending pile of washing. I’ve been finding room for my preserves in the pantry.

jarsThe children are happy.

Elena with magnifying glass HugoThe chickens are happy – and getting braver and braver. I think they’d come inside if they could.

brave adaI’ve got myself way too many bulbs for the garden, and Mum and Dad – who came for a visit via my aunt and uncle – turned up with loads of lovely cuttings from my aunt’s garden. There are some beautiful birds enjoying our trees.

birdAlex and I made it out for both ice-cream one evening and dinner another, which is such a treat. I made some glorious rhubarb jelly.

rhubarb jelly in mason jarThere’s a knitting project on my needles which I can’t bring myself to pick up. A simple beanie which has gone badly wrong. This is my sixth attempt at a hat from this ball of yarn – and I’m still not happy. At first I blamed myself and the pattern. So I changed patterns. It’s still a disaster, so now I’m pointing a finger at the yarn. Or maybe I’m still the problem! Gah.

So there you go – a scatty, activity-filled long weekend. I hope your Monday has treated you kindly.

Posted in canning, chickens, knitting, preserving, random, sweet, yarn | 1 Comment

Mid-week in pictures

Here are some pictures for Thursday. I’ve decided to make mid-week pictures a regular feature on ruth plus two. For us, the working week is all about survival, not so much about making. I don’t have many projects to share mid-week, but I always have photos! So here you go – some photos to show you what’s going on around the place.

chickens in the run strapped toe blackberry bucket raspberryElena rose woodpile ada flowerred leaf

Posted in chickens, garden, mid-week in pictures | 10 Comments

Chatterbox beetroot relish

chatterbox beetroot relishThis recipe is borne of a lovely conversation with a dear friend. We got to know each other when we were thrown together in high school maths and have been firm friends ever since. We’ve spent more time living apart from each other than in the same city. Sometimes we’ve been in different countries, but we’re never really that far away from each other. We’re coming up on 20 years of friendship. That I cannot believe.

I had my laptop propped up on our kitchen bench as we chatted and I chopped. And chopped and chopped. Two kilograms of beetroot peeled, ground and sliced, and 750g of onions peeled and ground and all mixed together later, and I realised I hadn’t been following a recipe.

groundA major boo-boo in the world of preserves.

We finished our conversation and I did some research online and developed this recipe. I was keen to find a relish which was mainly beetroot, and which didn’t contain apple.

up closeThe end result is spicy and has a bit of a kick. It has a great beetroot-y texture, with none of the goopy softness which sometimes find with chutney. I know it’s good because Alex requested a spoonful as I wandered past him after taking some pictures. It will be better in a month after it has had time to mature. I plan to serve it with cold meats and fetta cheese, with burgers and on cheese platters. And sometimes, probably, with vintage cheddar on toast.

Two kilograms is a fairly formidable quantity of beetroot. This batch made a good 12 8oz (235ml) jars. You could easily halve it for a more manageable amount.

For food safety reasons it’s important you process your relish in a boiling water bath. This can be as simple as a large soup pot with a rack or folded tea towel in the base. Likewise, food safety considerations mean you shouldn’t try to reduce the vinegar. I added a bit more than some recipes indicate, but only because I wanted to make sure I was making a safe relish – and because this recipe is apple-free…and apples are acidic. Only acidic relishes are safe to preserve in a boiling water bath as the pH protects the product from bacterial growth.

Other notes? Well, peeling beetroot is a messy business. I leave a few inches of the stalks intact and use them as a handle to keep a good hold on the vegetable, chopping the stalk off when the rest of the vegetable is peeled. I strongly recommend you wear gloves!

You have a few choices for the way you prepare your beetroot for this relish. You could dice or slice them finely. You could grate them coarsely (very messy if done by hand), or you could run them through a food grinder. I chose a bit of a mix because I like the texture of my relishes to be uneven. I fed two thirds of my beets through my food grinder (at it’s coarsest setting), and chopped the remaining third into matchsticks.

Chatterbox beetroot relish

  • Servings: 12 8oz (235ml) jars
  • Difficulty: easy
  • Print

Ingredients

2kg fresh beetroot
750g onions
1l (4 cups) white vinegar (apple cider or malt vinegar would also be suitable)
650g brown sugar
4 cloves of garlic, crushed
2 tsp grated ginger
2 cinnamon sticks
1 generous tsp turmeric
2 tsp paprika
Zest and juice of two oranges

Method

Wash and peel beetroot. Slice, grate or grind the beetroot and onion to the desired texture (see notes above).

Put all ingredients into a non-reactive, wide-mouthed, heavy-based saucepan and bring to the boil, stirring to dissolve the sugar.

Reduce temperature and keep at a simmer, uncovered, stirring regularly with a wooden spoon and keeping a good eye on it to avoid burning.

Simmer until the beetroot is cooked and the relish has reached your desired consistency – I wait until a wooden spoon dragged through the pot leaves enough of a trail behind it that you can see the bottom of the pan. Leave the relish a little wetter than you may like – it will firm up during processing. This process could take up to 2 hours. Remove the cinnamon sticks and discard.

Using a wide-mouthed funnel, ladle the relish into sterilised jars. Tap the jars on the bench to remove bubbles. Put the lids according the jars’ manufacturing instructions and process in a boiling water bath for 15 minutes (if you wish to use larger jars, I recommend you do some research to determine how long you should process them for).

Using bottle tongs, remove the jars from the water bath and place on a dry tea towel in a draught-free location. Leave to sit undisturbed for 12 hours. Test seals (if any haven’t sealed, pop them in the fridge and use them first).

Label and store in a cool, dark place. If sealed correctly, the relish should last unopened on the shelf for up to a year.

Posted in canning, dairy-free, gluten-free, preserving, recipe | Leave a comment

Ouch!

It turns out I wasn’t exaggerating when I mentioned my little toe was hurting. It’s broken!

Screen Shot 2014-03-03 at 7.16.47 pmX-rays are so cool. I find it fascinating that they’re digital these days. The technician took one snap and confirmed I’d done a good job. Medical science is just amazing.

The good news about having to hang out at home until 0800 this morning (when our doctor’s surgery starts taking calls for appointments) is that I had time to get some photographs of my weekend bottling efforts.

apples relish chopped tomatoesI managed five bottles of apples stewed with honey for the children’s porridge, four of chopped tomatoes, and eleven jars of beetroot relish. I’m going to have to reorganise our pantry to have a dedicated preserves shelf, I think.

The relish is yummy, and it’s just as well – I was chatting to a much loved (and missed) friend on Skype and merrily chopping away…only to realise after the beetroot and onion were ground and chopped (and mixed together), that I had completely neglected to follow a recipe! Whoops. Cue some frantic research and some calculations. Anyway, it turned out beautifully – and the bonus is I have an original recipe to share tomorrow!

Posted in canning, dairy-free, gluten-free, preserving, random | 12 Comments

Cake season: {gluten-free} rhubarb custard cake

We found ourselves needing somewhere to go at 0800 this morning. The children were up and Elena was raring to go. One of those days where we need to go out or things will really go pear shaped. I really don’t know where Elena gets her energy from (Mum – I’m looking at you!).

We headed out to the Capital Region Farmers Markets and arrived (along with a lot of other people – the crowds were crazy) around 0930. We didn’t realise before we went, but today was the market’s tenth birthday celebration and the mood was jovial. A lovely man accosted us at one point and gave us a farmers markets bag, along with a $5 gift voucher and a voucher for a kilogram of bananas. So sweet.

We used the gift voucher to buy some beetroot (beetroot relish, coming soon!) but we had no need for a kilogram of bananas. We ended up giving the voucher to a lovely looking family with two sweet children. I hope they like bananas – or at least passed the voucher on if they weren’t keen. We also picked up some gorgeous rhubarb, two kilograms of roma tomatoes (they’ll be bottled) and six kilograms of juicing apples. At $1 a kilogram I couldn’t pass the apples up – they’ll be stewed and bottled for the children’s breakfasts.

We had friends come over for afternoon tea this afternoon, so – with good intentions – one bunch of rhubarb was promptly baked into a rhubarb custard cake. I used this BBC Good Food recipe, and just used gluten-free flour and gluten-free custard. I baked it for a good time longer than it called for in the recipe, but I often find that when cooking with gluten-free flour.

bakedIt looks as though it sank terribly in the middle, but I’m afraid that’s the plate’s fault. I really need to get myself a nice, flat white plate. It did sink a little – but not horribly.

cakeThe cake is sweet and the rhubarb tart – it’s all very moist and moreish. It gets a big tick from me.

My baking was all in vain, however, as we ended up with way too much food for afternoon tea and didn’t end up serving it. We had biscuits from our guests, pikelets and a big plate of fruit – all for four adults and four children ranging from seven months to five years. Such a pity, but I should have thought it all through. I’m the Queen of Over Catering.

sliceI’ve no other exciting news…The chickens are very happy (no eggs yet). The children’s noses are snotty but they are otherwise well. Alex is well. I’ve done something horrible to my left foot. I stubbed it very hard when rushing to catch Hugo (who was heading out the back door) on Thursday morning and it has swollen up…and turned a pretty colour. Hmmm. One of the friends who came over this afternoon is a doctor and (strongly) suggested I get an x-ray. Double hmmm. I guess I know what I’ll be doing tomorrow…and then I have to work out how on earth I’m going to get a shoe onto my foot for work on Monday. Triple hmmm.

I hope you’re having a lovely weekend. We’re planning yum cha with friends tomorrow. I can’t wait. It’s cool and rainy here – a dreary start to autumn. I wonder if it’s going to be a cold winter this year?

Posted in baking, gluten-free, sweet | 6 Comments

How to make your own drinker for chickens – for under $30

There are lots of great automatic drinkers for sale around the place – unfortunately most of them cost a lot of money! Whilst browsing on the Australian Backyard Poultry Forum, I came across a great thread about making your own. I have condensed all of those instructions and hints into this post…and added a few of my own.

Let me be clear – this was not my original idea, I have just condensed the info from my own research online.

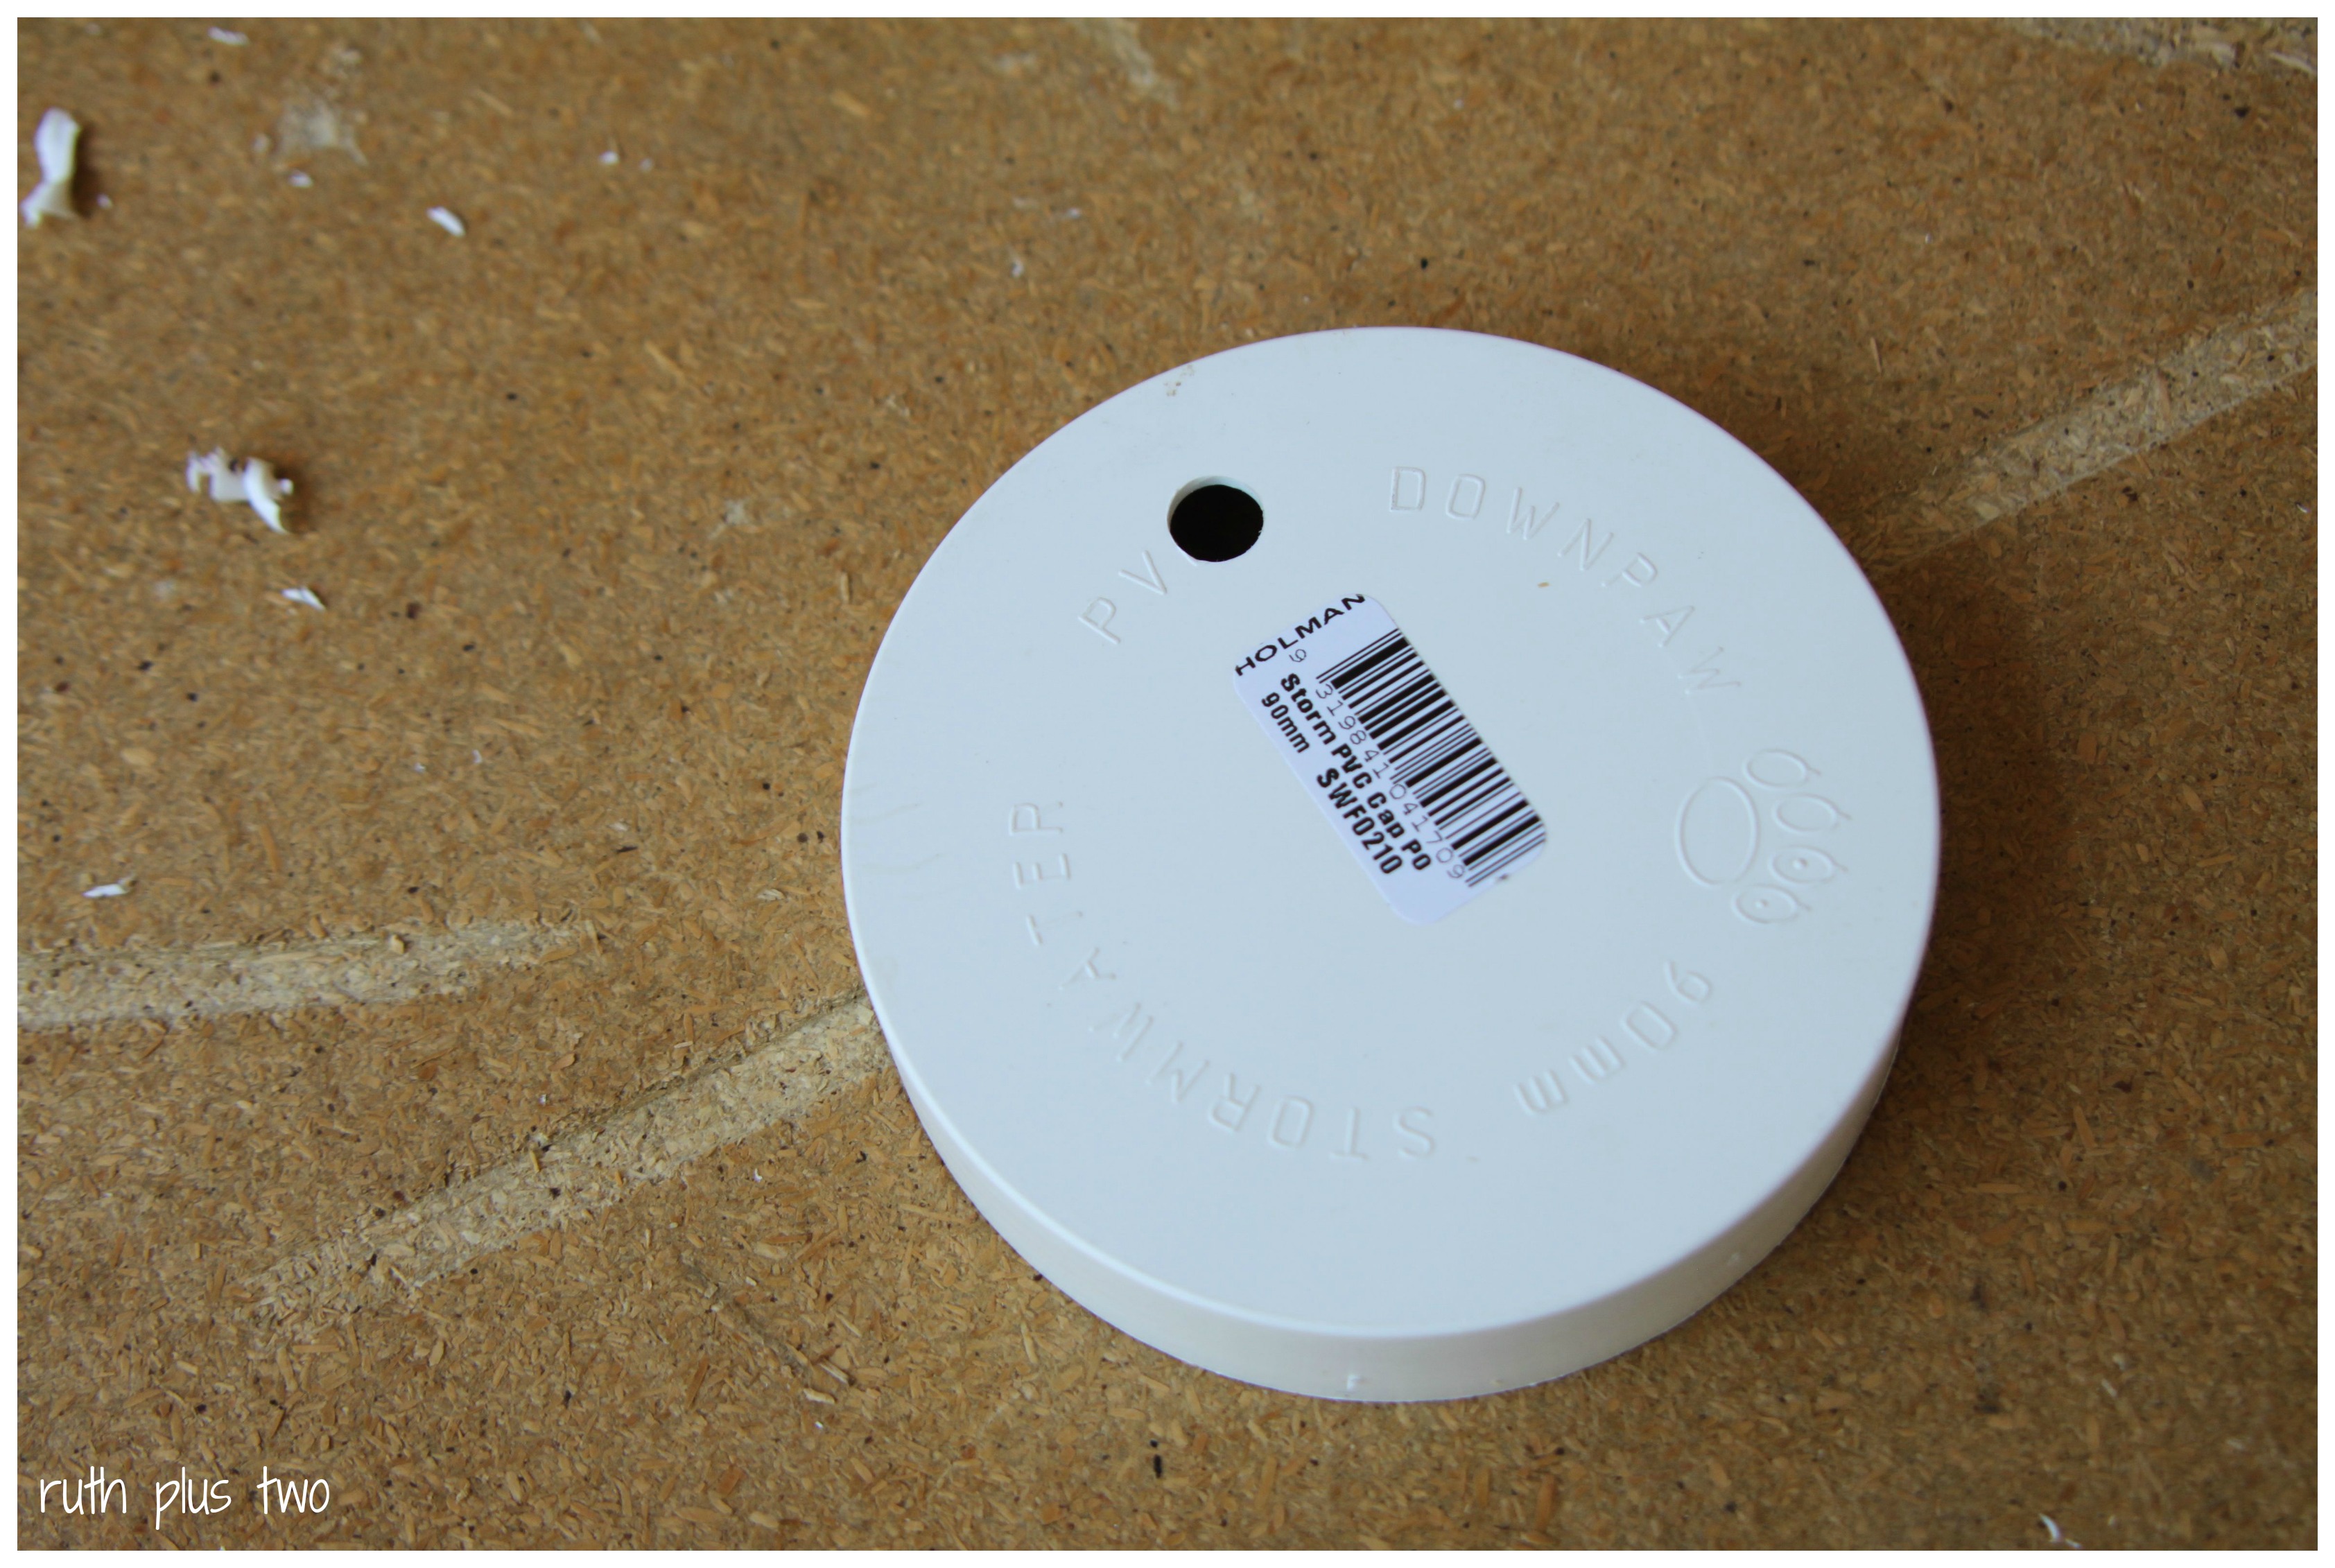
What you need: a length of PVC pipe (mine was 1 meter long and 90mm in diameter), two caps to fit, one or two drinker cups (sometimes referred to as lubing drinker cups – we got ours from Royal Rooster for less than $20 including shipping), a drill and drill bit, permanent marker, masking tape (optional), silicone sealant (optional).

We made this drinker in 20 minutes from start to finish, for under $30. If you used only one drinker cup, or could buy them locally to get out of paying shipping it would be even cheaper.

First, work out which drill bit you need. As the threads of my drinker cups were tapered, I chose a drill bit the same diameter as the smallest part of the thread so that, as I screwed them in, the wider part of the thread would form a good seal. You want the cup to screw in as snugly as possible.

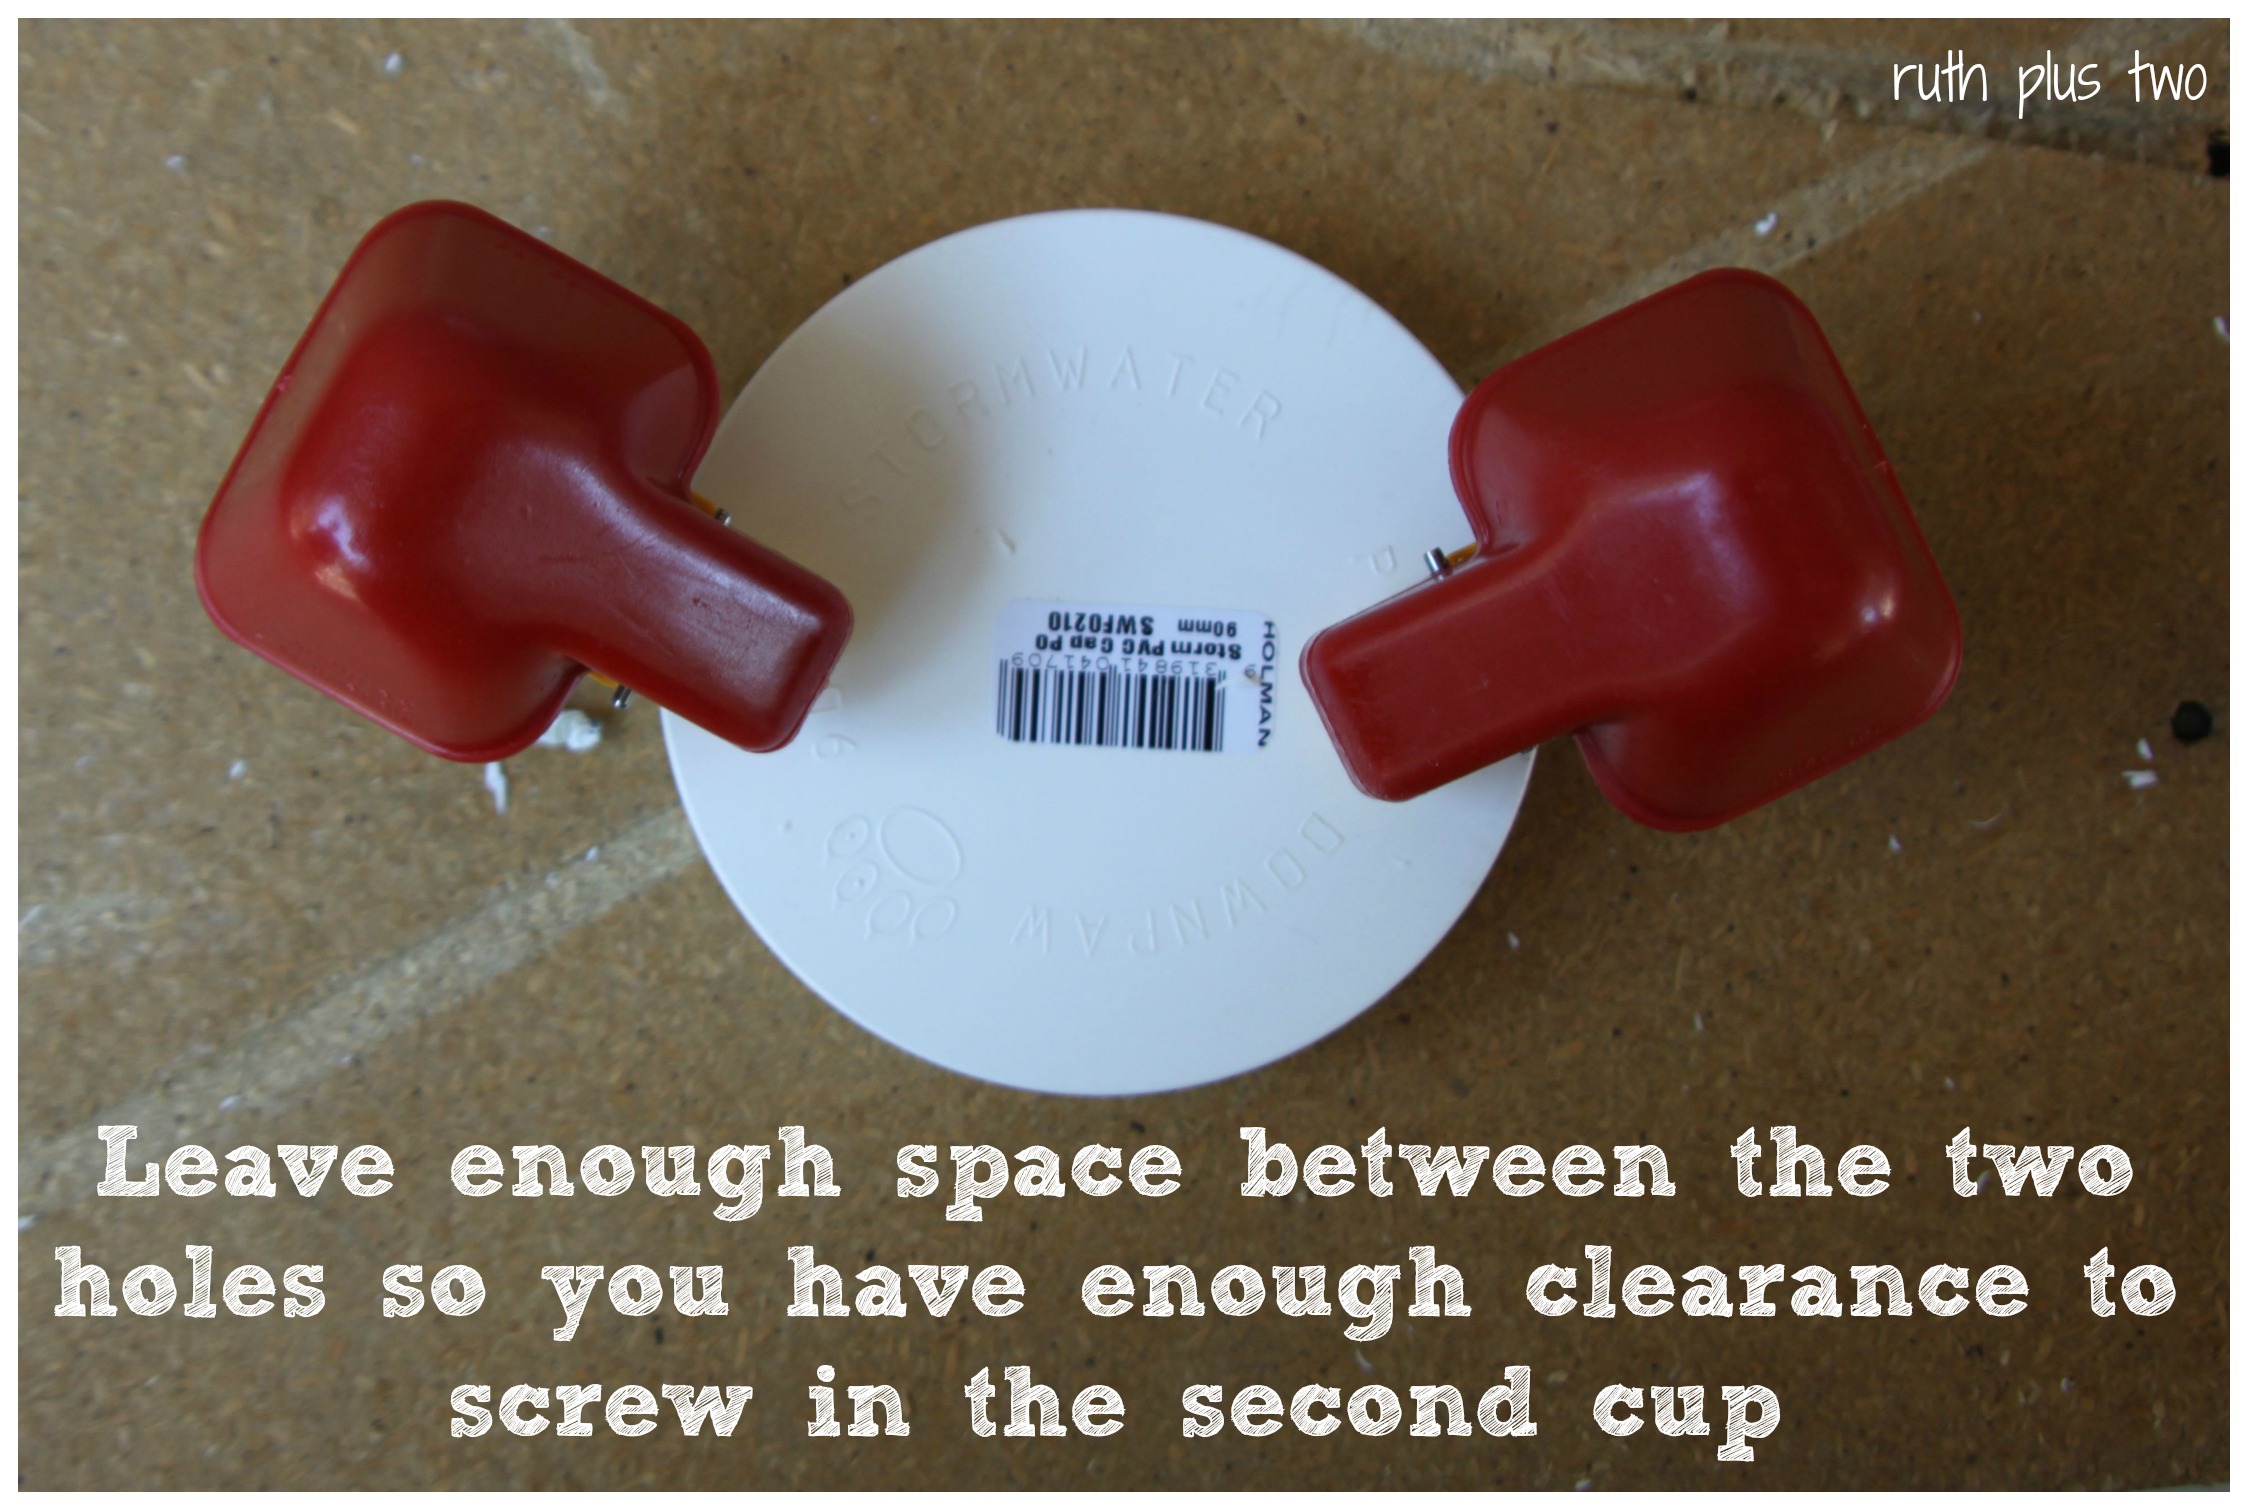
Work out where to position your first hole on one of the pipe caps. Make sure it’s close enough to the edge that as much of the drinker cup as possible is available to the chicken, but leave enough distance so that the internal section of the drinker cup clears the pipe when it’s inserted into the cap.

Mark the location of the hole with your permanent marker. I read a hint that the drill bit can travel a bit, so it can be handy to make the mark on some masking tape. Another hint was to make the first hole with a small drill bit, and then follow with a larger drill bit to reduce the risk of your plastic cracking.

Drill your first hole, and screw the drinker cup in firmly – it might take a little effort to get the thread to catch in the hole.

holeone cup inIf you’re only adding one drinker cup, you’re done!

If you want a second drinker cup, work out where to drill your second hole. You need to make sure the holes are far enough apart that you have enough clearance to screw the second cup in (ask me how I know that…let’s just say that the cap on the top of my drinker has two holes in it!).

Drill the second hole and fit the second drinker cup.

clearanceAt this stage, you can add some silicone around the holes on the inside. I didn’t, because when I poured some water in, it appeared watertight (a few weeks on, it’s still fine).

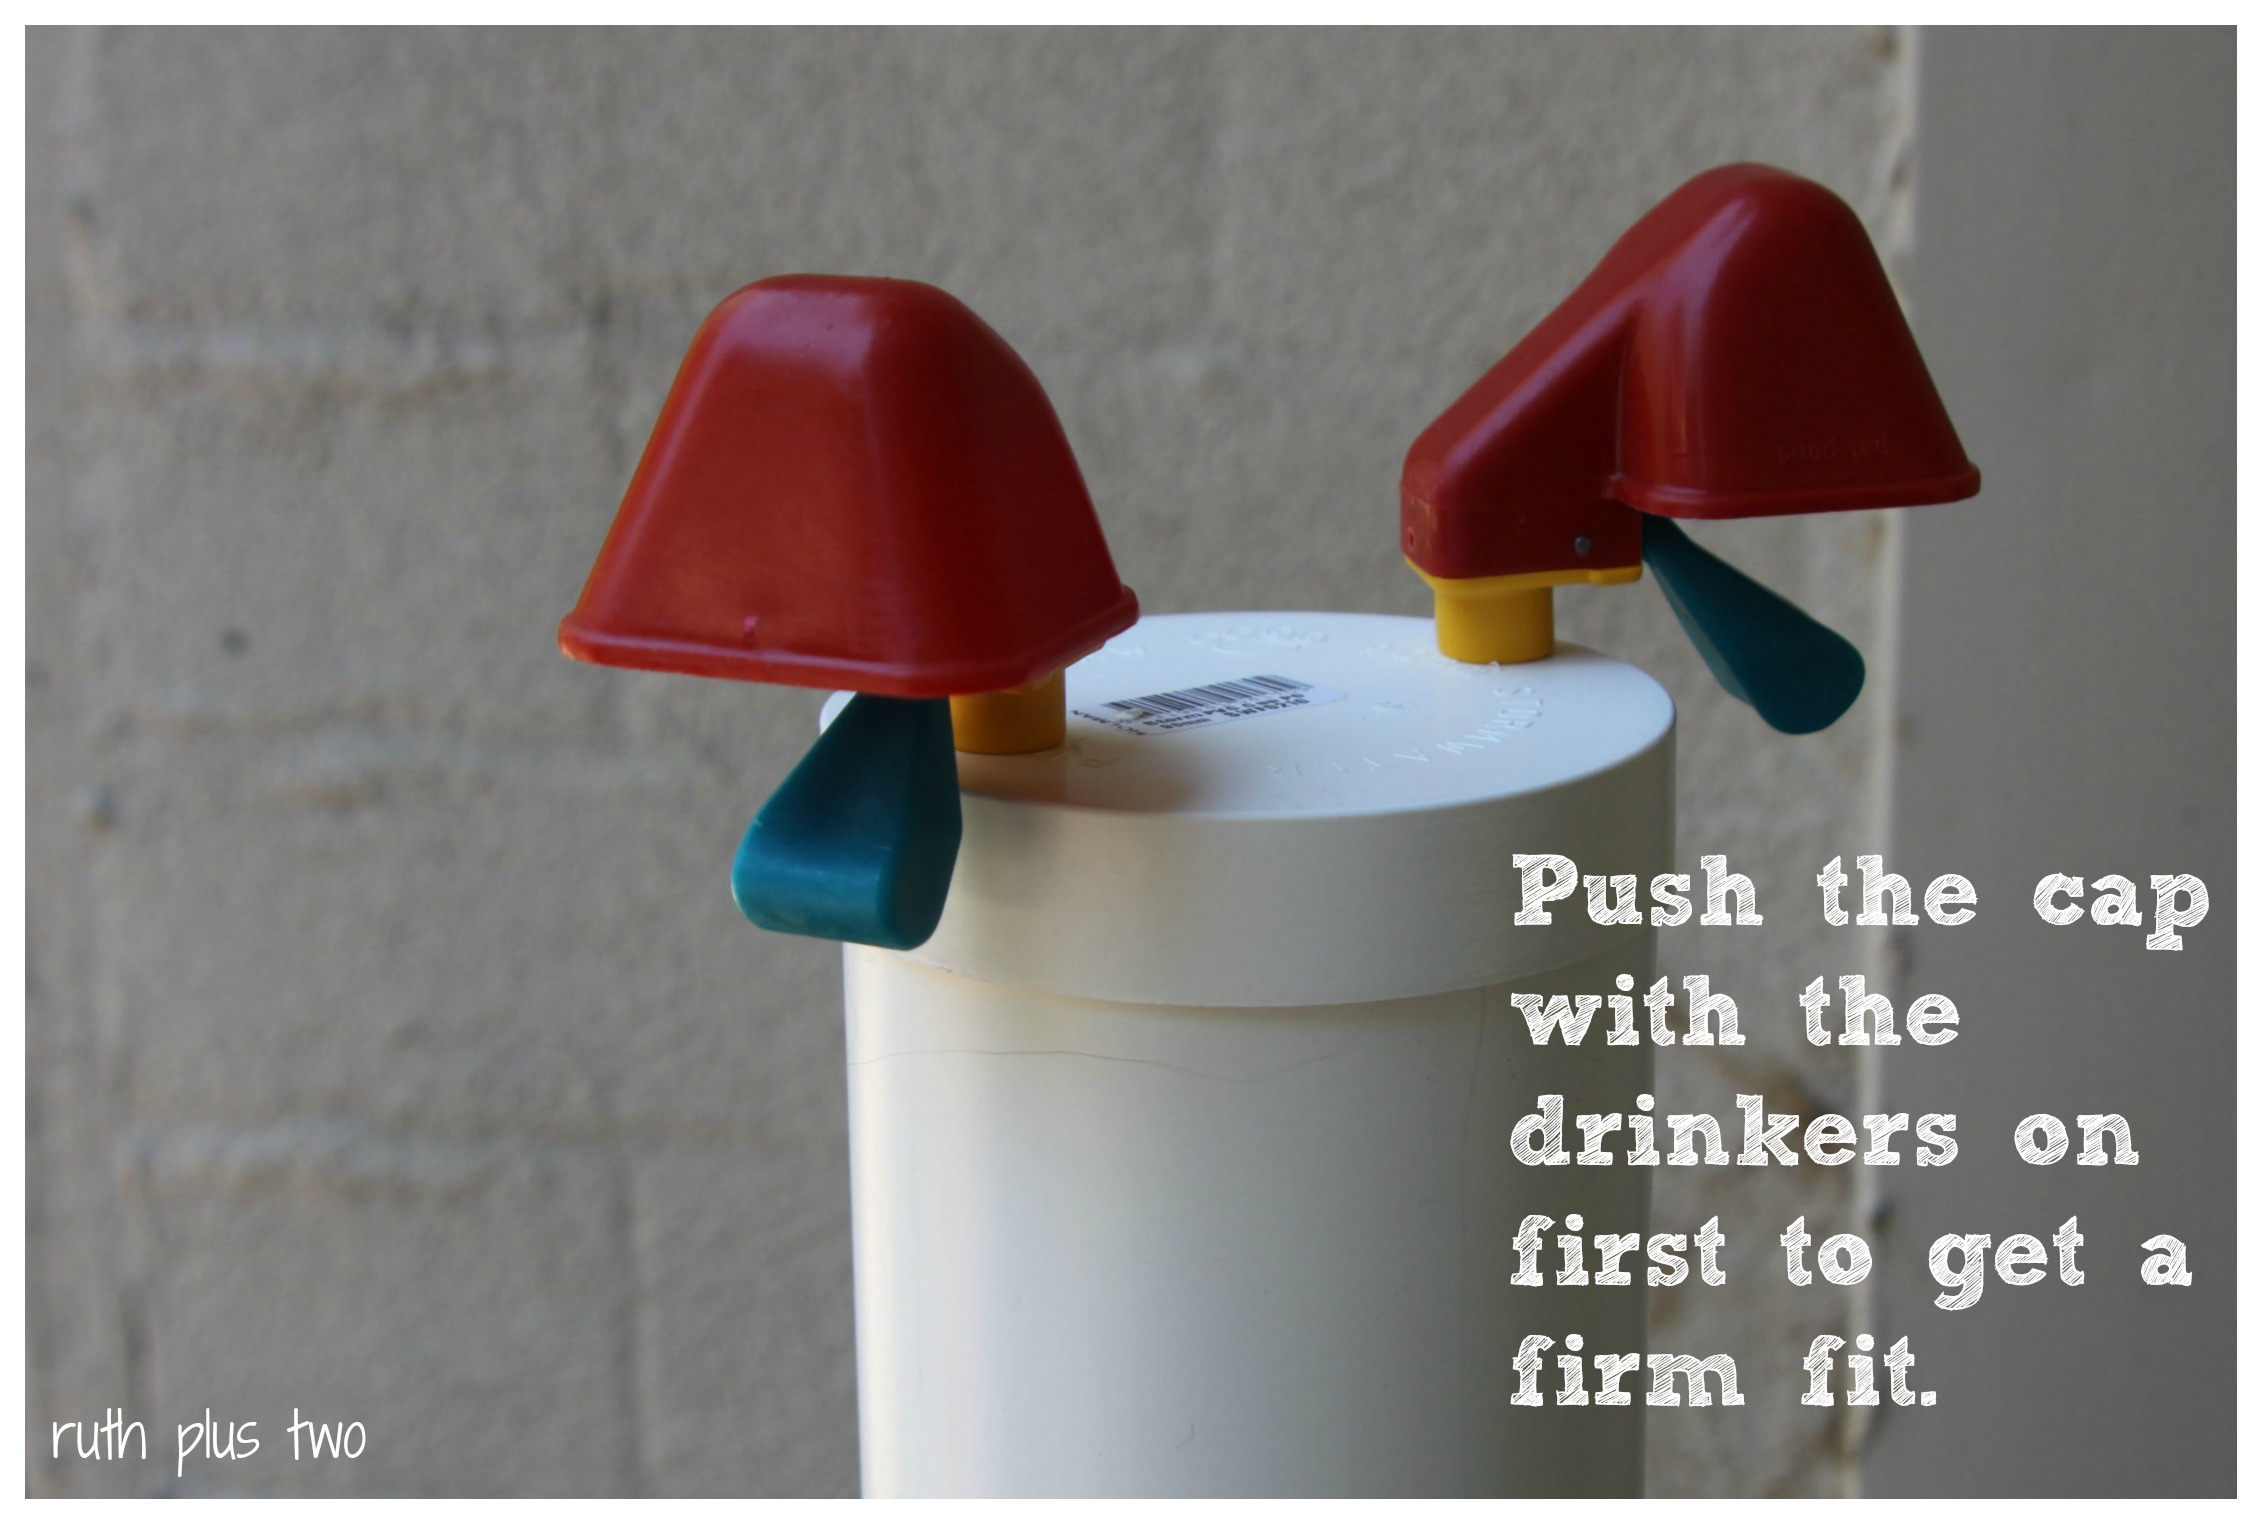
Push the cap onto the pipe. Again, I didn’t use any silicone as it wasn’t leaking. Also, just pushing it on means I’ll be able to pull it apart for cleaning.

this cap firstTest your set-up for watertightness by filling it with a few cups of water and watching for leaks.

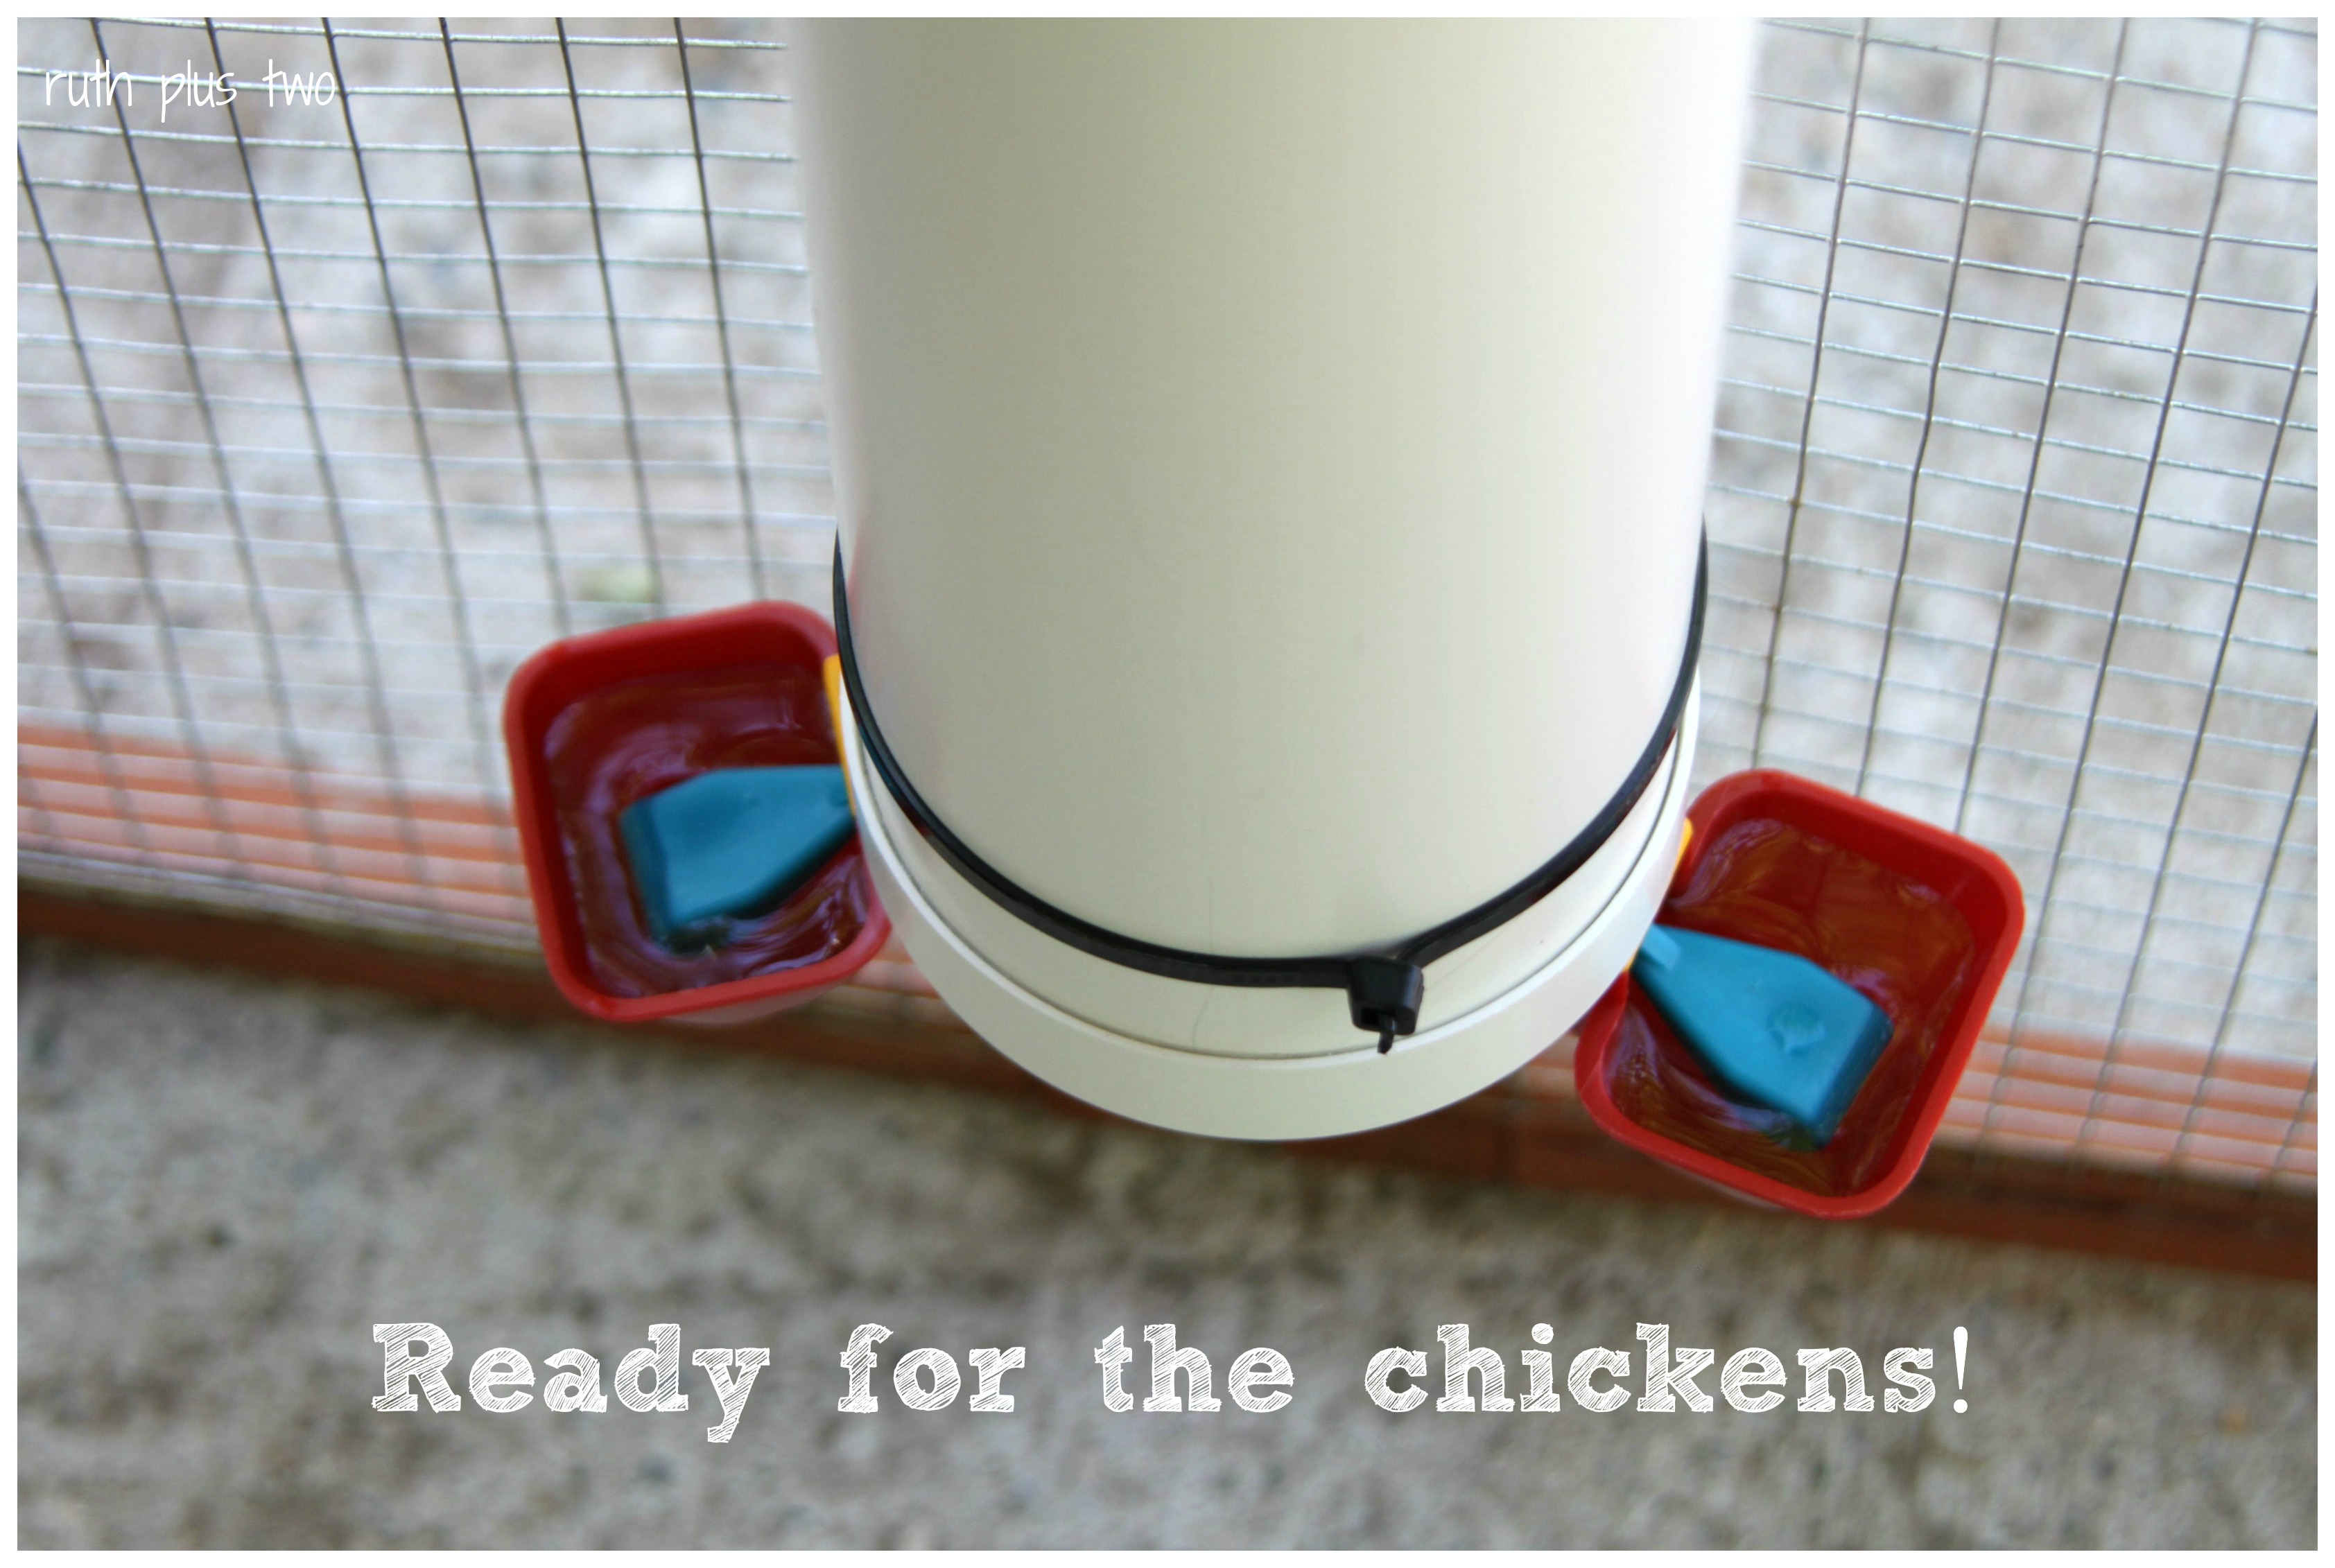
Attach the waterer to your chicken coop/run. We did this using cable ties, but you could also buy a stormwater pipe bracket if you can screw it to a solid surface.

cable tiesBecause I wasn’t sure how the structure of our run would cope with the weight of the waterer, I fitted it at a height where I could pop a brick under it to take some of the weight if needed. It turns out that we’ve not had a problem. I’ve watched the chickens using the drinker and I think we’ll raise it a little next time we’re working in the coop.

drinkerPick a spot where the waterer will be out of the sun – you don’t want your water to heat up or your chickens won’t want to drink it.

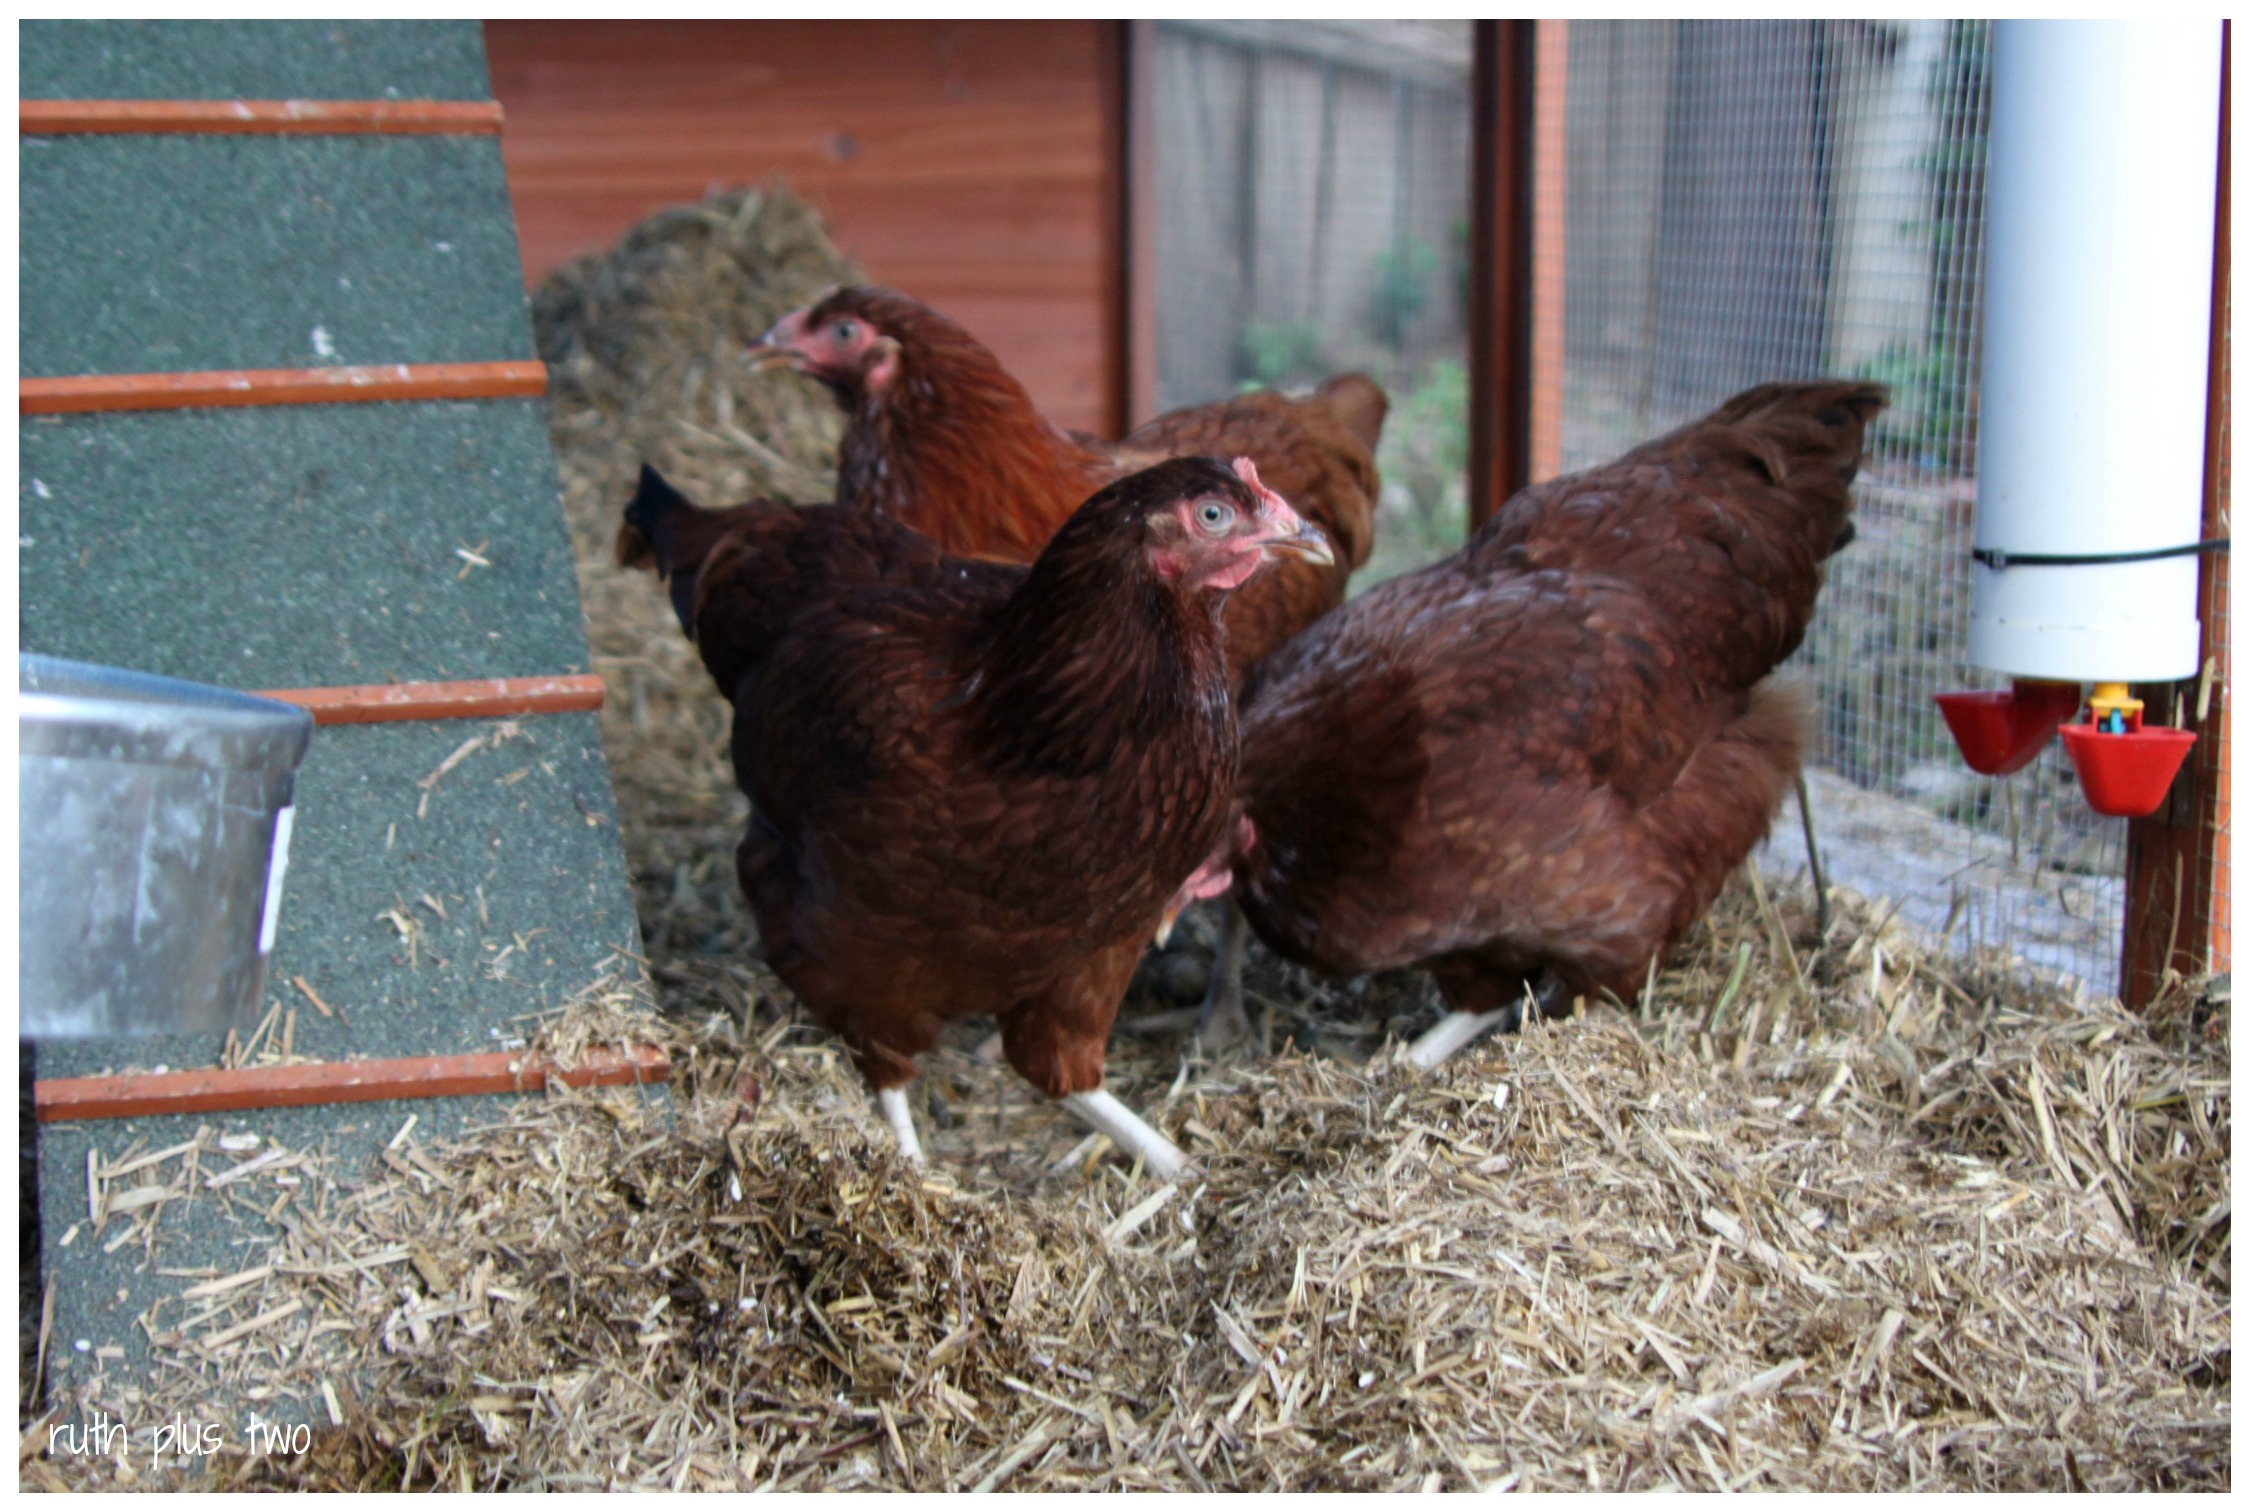
Fill with water, place second cap on top. This one holds approximately seven litres.

You’re done!

ready for chickens
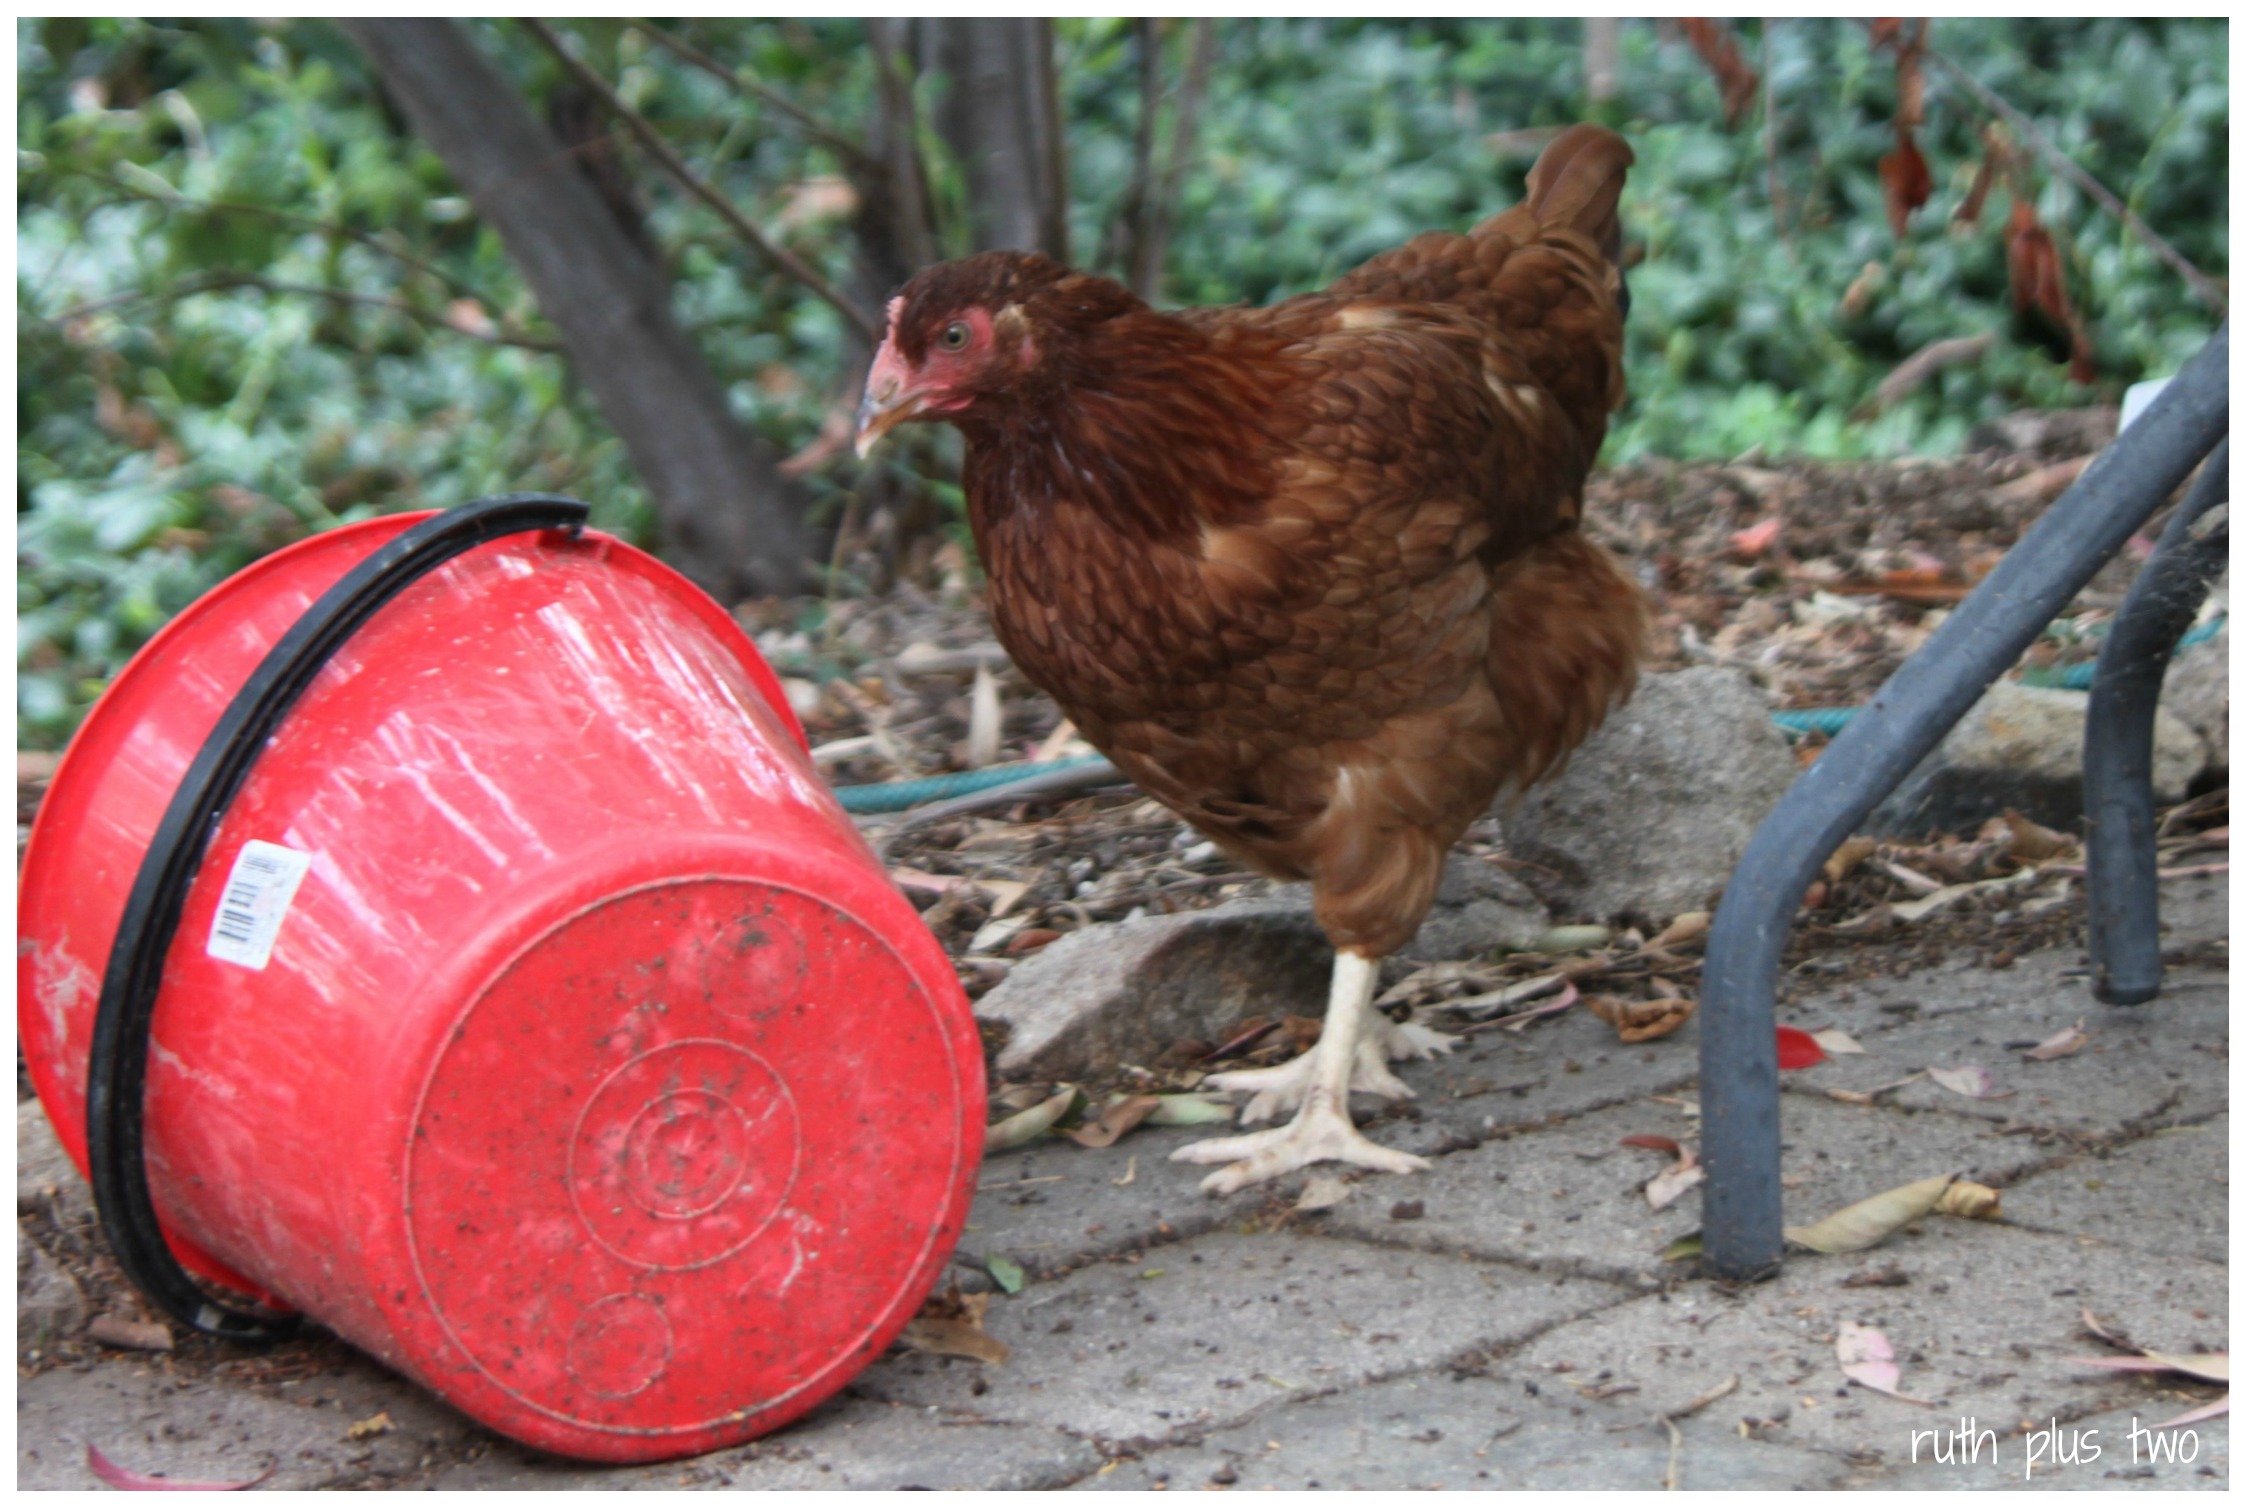
For the first few days I provided the chickens with an additional water source because I wasn’t sure if they were familiar with this style of drinker. Once I’d seen all of them use it a few times, we took the other container away (they were scratching all sorts of muck into it).

The main advantage of this type of drinker is that the chickens can’t dirty their water. I was a little concerned that the drinker cups could seize up, which is why I added two. If you have a large number of chickens you should consider adding two cups, or making more than one drinker.

I think the chickens find these cups easy to drink from. They don’t have to peck the float to get water – there is always water sitting in the cups, which refill whenever water is drunk or evaporates.

We will be adding a few teaspoons of apple cider vinegar and a clove of raw garlic to the drinker each time we refill it, to keep internal parasites (worms) at bay.

Let me know if you make your own chickens a drinker or if you’ve got any handy hints to add. I’d love to see what you come up with!

Posted in chickens, DIY, tutorial | 2 Comments