I’ve been making doll clothes to send to a little girl I fostered when I lived in China years ago. She lived with me for over a year – until she was a little over two years old. This sweet one lives in the States now, and just turned eight. Eight!! I certainly can’t believe it.
I always try to send her something she’d like for her birthday and at Christmas time, but it’s really hard with her being so far away – and she’s an eight year old now, a totally foreign species! This year, I got word that she was after some new clothes for her American Girl Doll so I’ve been sewing. So far, I’ve managed a little dress and cardi combo, as well as a tutu.
As the final piece of the puzzle I’ve sewn a little cap sleeve peasant dress. I couldn’t find a tutorial or free pattern online for what I was picturing, so I’ve written up my very first tutorial with free downloadable PDF pattern.
 The pattern will fit most 15″ and 18″ dolls. Doll measurements vary, so measure up your doll to check the dress will fit. The dress fits our 15″ Waldorf (Steiner) doll, and it is designed for 18″ American Girl Dolls. Finished garment dimensions are: shoulder to hem, 10″ for 18″ size (8″ for 15″ size); chest 18″; sleeve/cuff measurement, 6″; neckline, 10″. To give you some idea of fit, Harriet is a 15″ doll, wearing the 18″ size – it fits well, aside from the dress length. Harriet’s chest measurement is 11″. If you’re willing to fiddle with the pattern pieces a little, you can change the dimensions of the dress to fit your doll. If you want a slimmer fit you can take off a bit of the pattern along the fold line of each piece – just make sure you take the same amount off both the front and back.
In addition to the pattern pieces, you will need coordinating thread, elastic (I used 1/4″ elastic) and bias binding. I made my own bias binding from the same fabric as the sleeves so it all looked pretty. You could also use store bought binding.
The pattern includes a 1/2″ seam allowance. I generally press seams after each step as it gives a more professional finish. I prewash and press my fabrics.
So, here you go!
Print the pattern – download here – and cut out fabric pieces. When you’re printing, make sure your printer isn’t set to scale the document to fit the page. You want to print at actual size. There is a 1″ square on the pattern so you can check that the pattern has printed correctly. For this dress I cut the fabric with right sides facing out to make sure I liked the way the pattern pieces sat over the print.

 You’ll end up with two sleeve pieces, one dress front and one dress back.
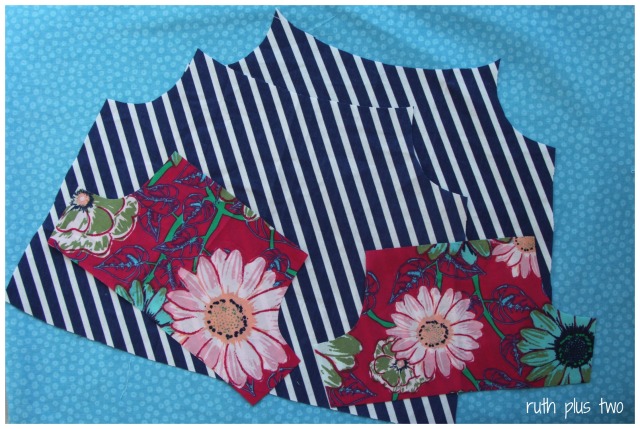 Pin the sleeve pieces to the dress pieces, right sides together, and sew with a 1/2″ seam allowance.

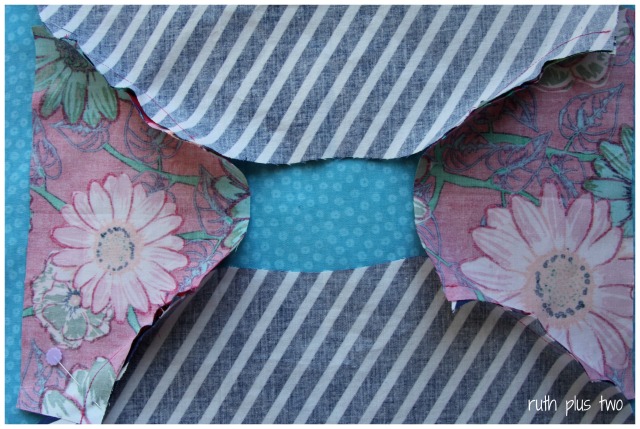 Finish seams as desired – I finished mine with an overlocker (serger).
I must admit that my overlocker and I are not the best of friends. I didn’t bother to change the thread over to white. I could be liberal with the truth and tell you it was because I wanted the finish to be clear in the photos but that would be a lie. I didn’t want to wrestle with the million threads and upset the tension, which is borderline anyway. I really must find the time to do an overlocker course…
Pin the front and back dress pieces and sleeves right sides together. Sew side seams and finish as you wish.
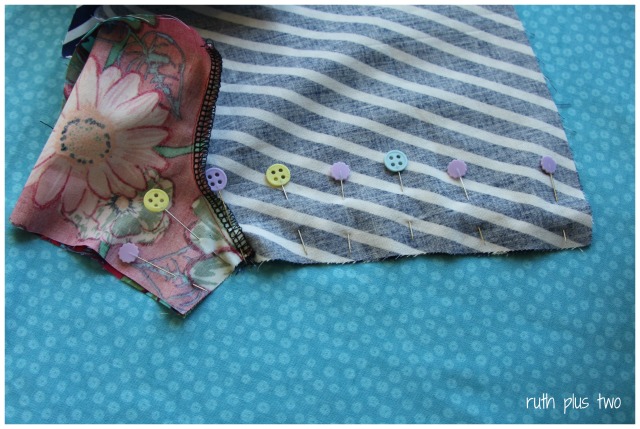
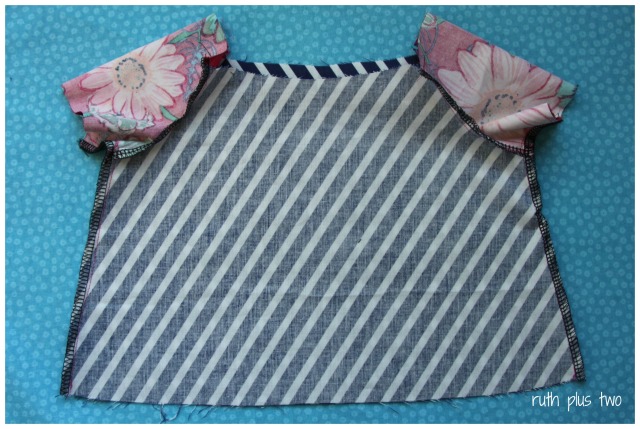 At this point, I made the bias binding for the hem and neckline. I have recently invested in a bias binding maker which makes life so much easier (thank you 40% off voucher combined with birthday money)! This bias binding is 1″ single fold bias binding.

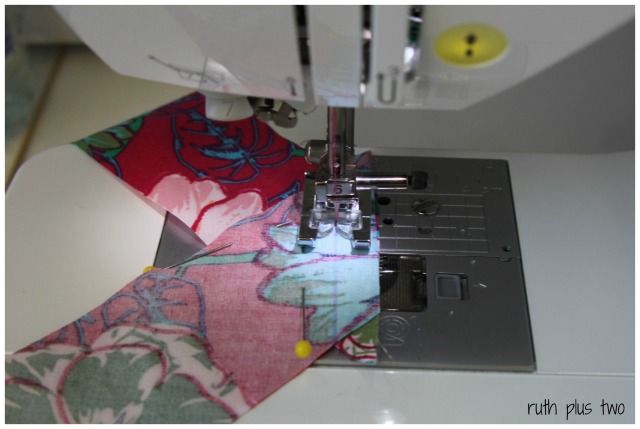
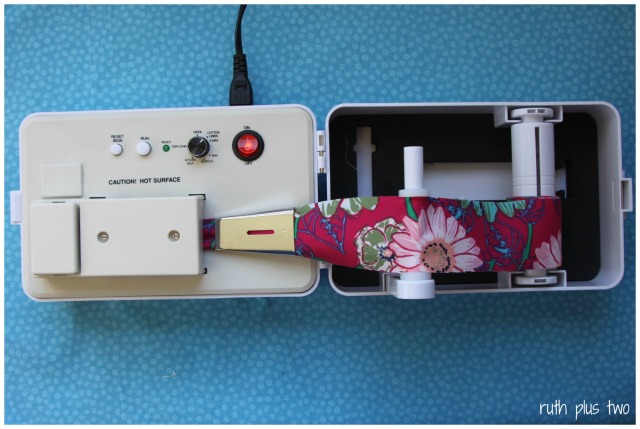
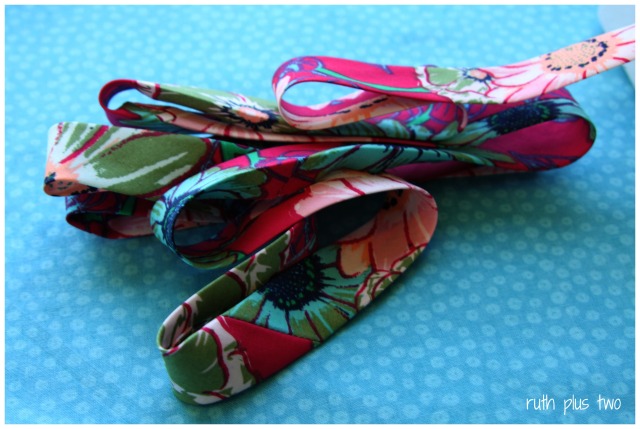 I’m sure there’s a more professional way to attach bias binding, but this way works for me. Doing it this way means I can watch the stitching and make sure the top stitching looks neat from the right side. If you have a favourite way of sewing on the binding, go for it!
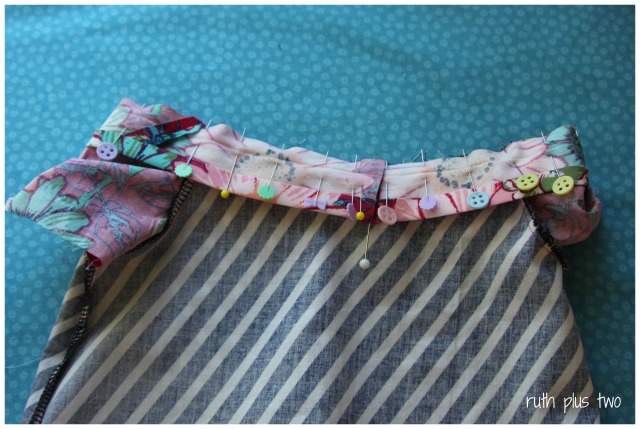
To attach the bias binding to the hemline, open the binding out and pin it, right side of the binding down against the wrong side of the dress fabric. I start pinning at one of the side seams.
 I fold the start of the binding over by 3/8″, as pictured, so that, when finished, there is no raw edge visible.
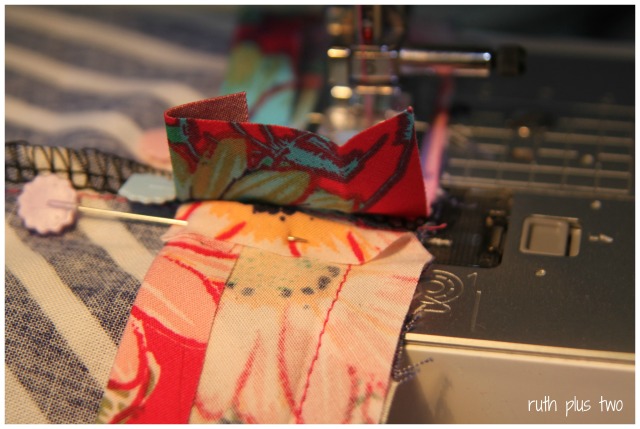 Sew the tail of the binding over the fold so there is no gap.
 Press the bias tape away from the dress.
 At this point, I often trim away an even 1/4″ of dress fabric to make the binding easier to fold over.
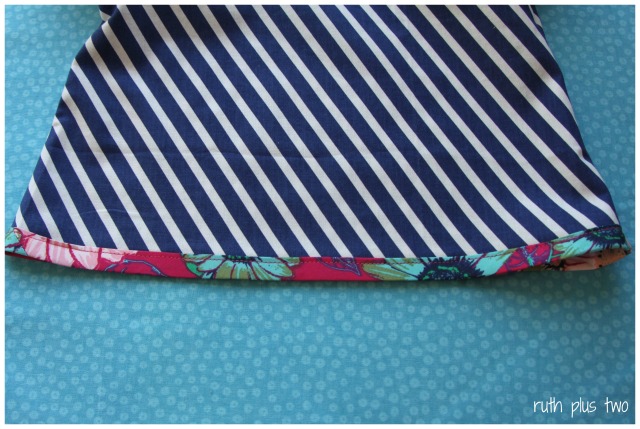
 Fold the binding back over to the right side of the dress, taking care to pin it over the stitching which attached the binding to the dress in the first place.
 Top stitch the binding in place. I use a spot on my sewing machine foot as a guide to keep the stitching even. You might need to wrangle the join so that it sits well. Top stitch as close to the edge as you can neatly.

 Follow the same process to attach the binding at the neck, although, this time, leave a gap (about 1 1/2″) where you can insert the elastic. I use two pins inserted next to each other to remind me to stop sewing for the gap. I generally stop and start the binding in the centre of the dress back.

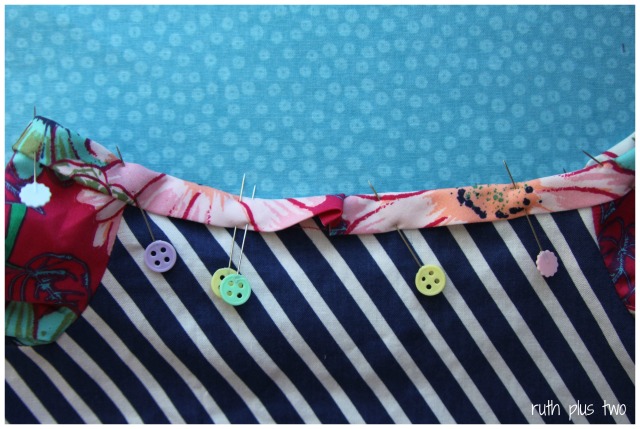

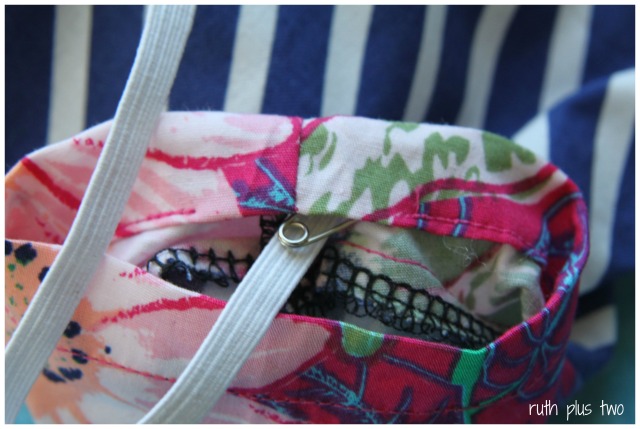
 Insert 11″ of elastic into the gap left in the neckline. You can vary the length of the elastic to suit the style you’re aiming for. To make this process easier, I mark the same side of the elastic on both ends – it helps you tell whether you’ve accidentally twisted the elastic while guiding it through. Don’t forget the old trick of using a safety pin to help the elastic through the casing.
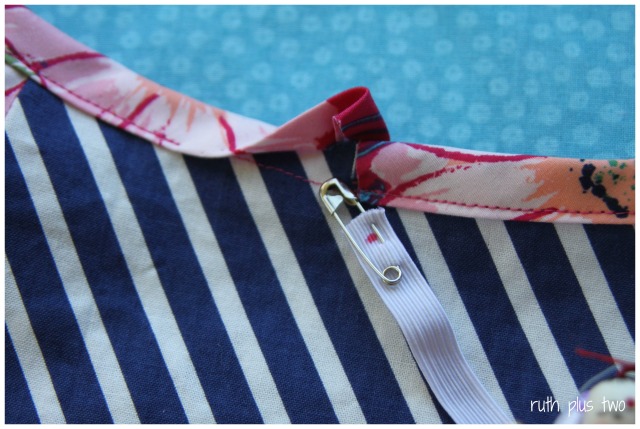 Stitch the elastic together, overlapping by 1/2″. I never bother doing this too neatly…it will be hidden.
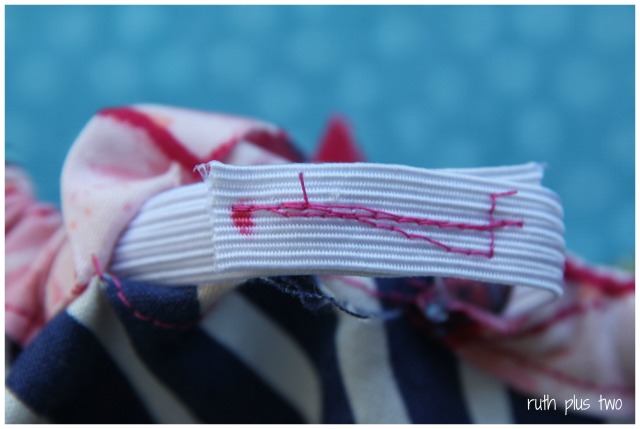 Stretch the elastic out and finish top sewing the binding to the neckline of the dress. You don’t need to be 100% neat here – the elastic will cause the binding to bunch up anyway.
 To finish the cap sleeves, fold the raw edge over by 1/4″ and press. Fold over by 1/2″ and pin.
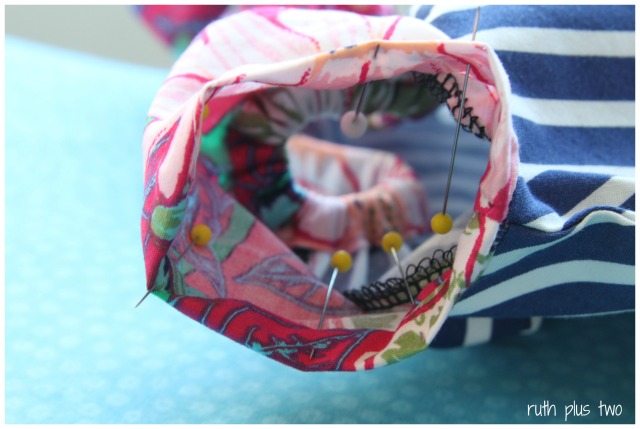 Sew, leaving a gap for the elastic (I used 6″ for each sleeve). Insert elastic as before, making sure to overlap the same amount for each sleeve so they gather evenly. Sew casing closed.
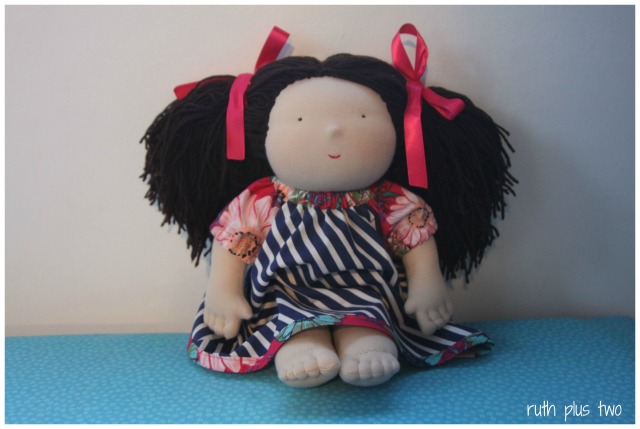 I’d love to see any dresses made using this pattern – link back to this tutorial, or post on the facebook page! Please let me know if you have any questions or if anything’s not clear – I will answer any questions and update the tutorial accordingly.



A bias tape maker?? I had no idea such a thing existed! I guess I know what’s going on my Christmas list this year! I find bias tape so finicky to work with sometimes, thanks so much for sharing how you deal with it! Great tutorial 🙂
Cheers,
Eileen
It is fantastic 🙂 I got so sick of burning my fingers – the bias tape maker makes it so, so much more fun!
What a wonderful detailed tutorial! Perfect for beginners like me who need step by step instructions. We have a sad naked baby doll at our house who needs clothing – you’ve inspired me!
I love your adorable button pins too.
Make sure to let me know how you go – I’d love to see the finished result 🙂
Before I comment on the bias maker (hoot hoot!) I must say you are so very thoughtful and generous! It is hard to keep in contact with people over such a long distance, especially when they turn into foreign species… Bias maker – I thought I was amazing having two sizes of makers of the ‘manual type’, but this is pure luxury, congratulations on that purchase!
I have never regretted it for a moment 😉
you saved me tonight. We are doing the Silly McGilley St. Patricks day tradition. And well I made my daughter a peasant dress a few days ago for St. Pattys day and I thought how cool would it be to make one for her Cabbage patch doll (of course Silly McGilley made it but.. You know.. Well thanks to you I was able to do it in just a few minutes at the last moment and didn’t have to figure it out on the fly. Thank you so much for your generousity. I will be sure to link you when I post to facebook tomorrow or the next day! Thanks again you are awesome.
Yay! I’m so glad you found it useful. I’d love to see a photo – feel free to share on ruth plus two’s facebook page 🙂
I am a fairly experienced seamstress, but don’t always have a lot of time to sew since my 40+ hrs per week is in the business world. It is wonderful to see this all explained in detail that I can proceed quickly without having to figure out the details – my granddaughter loves the end result not the time I spent figuring out a new pattern!! I too have a manual bias tape maker – will look for one like yours next time I go to a big box fabric store – we live in a small town. Thank you!!!!
It’s my pleasure! It’s so fun to make dolls clothes 🙂 I love the look on my daughter’s face when she sees something I’ve made for one of hers.
The bias tape makers certainly make things quicker (and less burnt fingers…!).
Thanks for the feedback, I love to hear from readers 🙂
So generous to share this, thank you – what an attractive little dress. I have a Stella peach doll who is going to have her clothes made out of cannibalised child-owner’s outgrown clothing – so this tutorial is a great place to start. Re the bias tape maker – I wear a white cotton glove (sold in chemists/pharmacies for eczema and the like) on my other hand (the one not holding the iron) and this protects adequately from scalds from the steam, and burns from the intense heat from the iron itself. You can also get black gloves for use when using hair straighteners etc, though I haven’t tried these out yet for bias binding-making.
Such a clever tip on the gloves. Thanks!
I love your 18″ doll dress pattern. How would I enlarge it to make a matching dress for my 5 yr old grand daughter?
Hi Paula, I think it would be pretty hard to grade this pattern up to fit a child. There are plenty of free peasant dress patterns for kids online. Maybe do a search for free peasant dress pattern for girls and see what you turn up? Good luck!
Thanks for the pattern! I did a quick simple version out of old pj pants to make our girl a little nightie and it worked wonderfully for this sewing unable mama. 🙂
Great news 🙂 Thanks for letting me know!
Hi Ruth,
Thanks so much for the detailed pattern and tutorial. My granddaughters each have a Bitty Baby, and I have one of these dresses made and one to go! Happy Holidays 🙂
Thanks for sharing your cute pattern.
Thank you! I needed just this pattern for my granddaughter’s Dollie and Me dresses! 🙂 You are kind to share!
Thanks so much for the perfect pattern and wonderful tutorial! God bless you! 🙂
Thank you for this pattern. It was perfect for my granddaughter’s bear.
Thank you so much for the pattern, I would post pictures of the finished product, don’t know how. I made my dress for an American Girl doll wellie wisher. perfect fit. I would love to purchase more patterns [pants] should you design them. Thank you again Terry